This tutorial assumes you’ve already logged in to Drupal
1) Click the Administer link
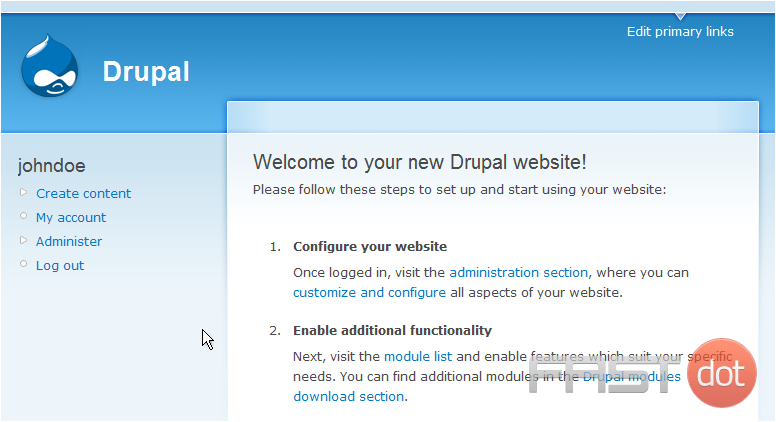
Now let’s learn how to manage menus
2) Click the Menus link
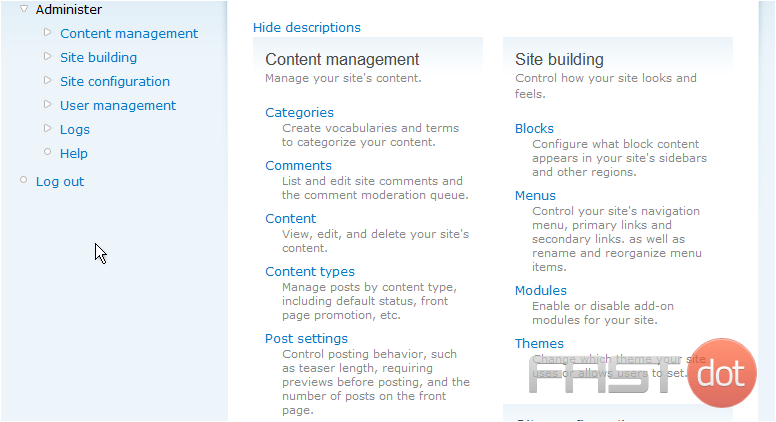
This is the Menus page where we can add, edit, or delete menus to our web site
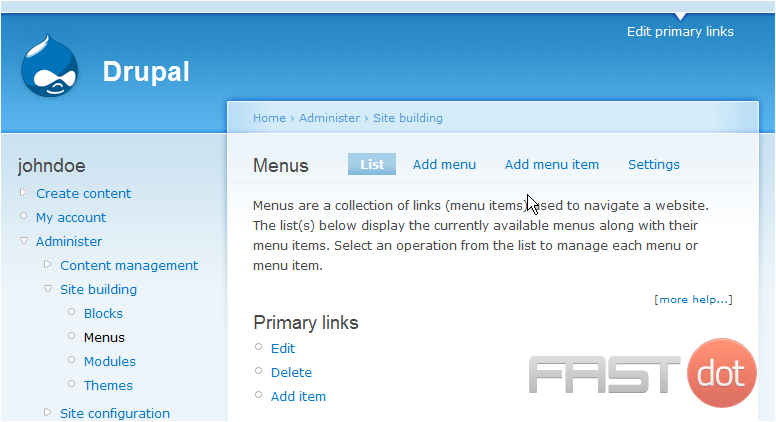
As we can see, some menus are currently disabled, let’s enable a disabled menu now
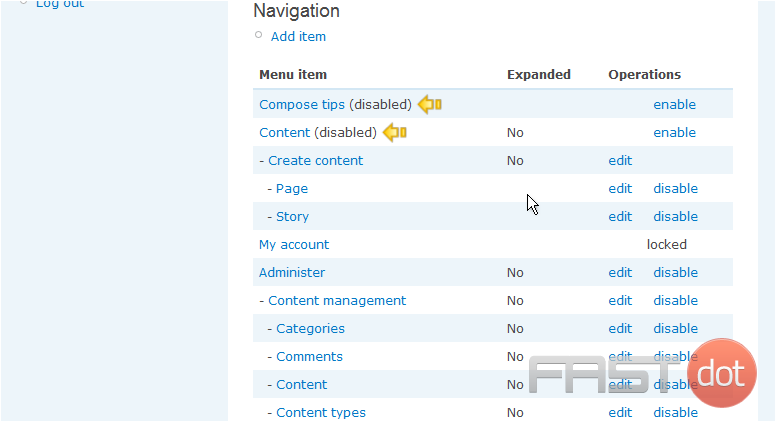
3) Click the enable link
We can edit the details of the menu item here if we wish
4) When ready, click Submit

The menu item we just enabled now shows here
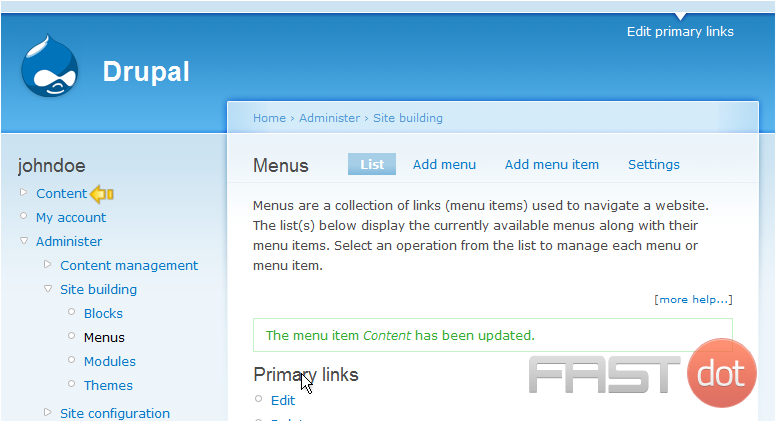
Now let’s disable a menu item, scroll down
5) Click the disable link for the menu you want to disable
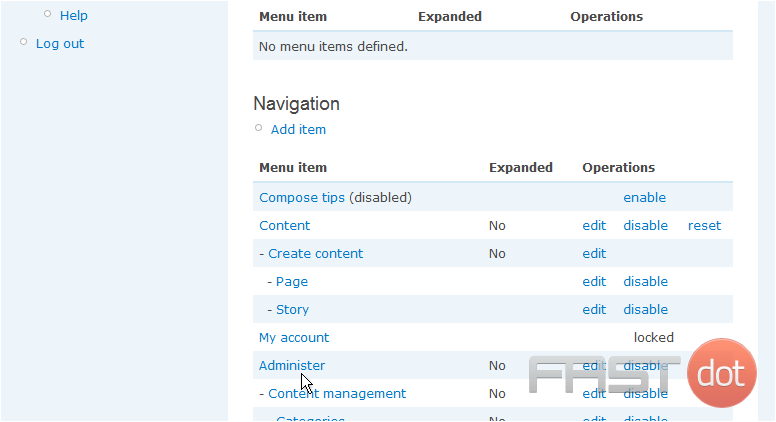
6) Click Disable to confirm
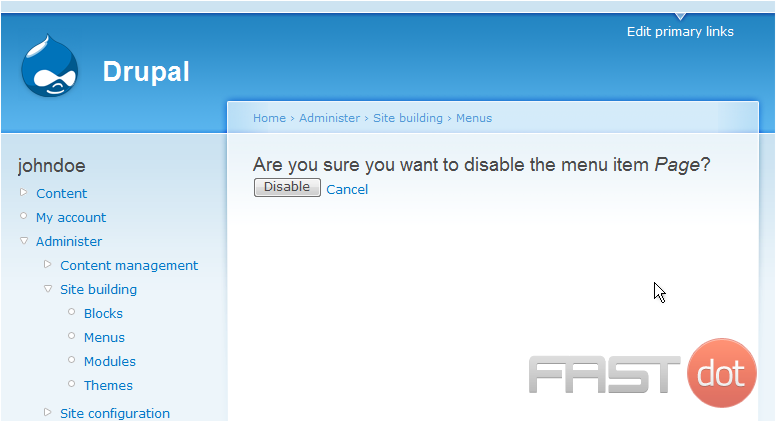
7) That’s it! The menu item has been disabled. Now click the Settings link
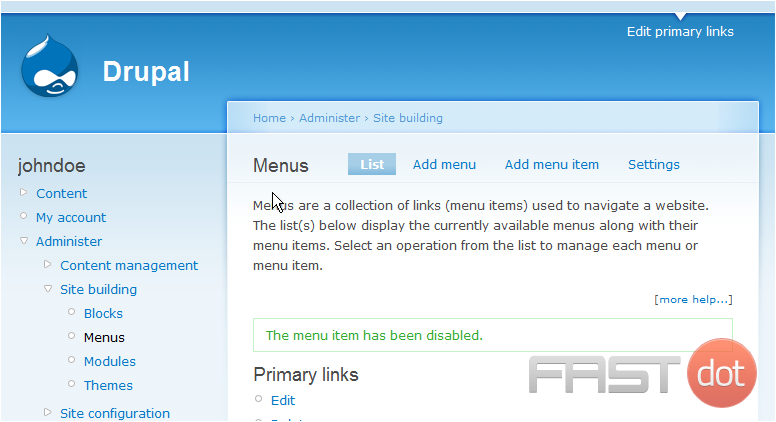
8) After making any changes to the settings of the menus you wish, click Save Configuration here
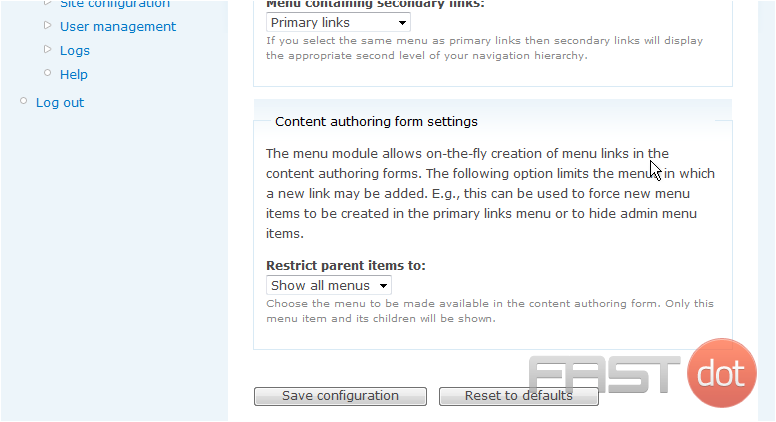
This is the end of the tutorial. You now know how to manage menus in Drupal
How to Manage Menus in Drupal
Managing menus in Drupal involves creating, editing, and organizing menu links to help users navigate your site. Follow the steps below to effectively manage menus in Drupal.
Steps to Manage Menus in Drupal
Step 1: Log in to Your Drupal Admin Panel
- Access the Drupal site: Open your browser and go to the Drupal site where you want to manage menus.
- Log in: Click on the Log in link usually located at the top right corner of the page. Enter your username and password, then click Log in.
Step 2: Navigate to the Menus Page
After logging in, navigate to the Menus page:
- Click on Manage in the top menu.
- In the submenu, click on Structure.
- Under Structure, click on Menus.
Step 3: Create a New Menu
- On the Menus page, click on the Add menu button.
- Fill in the fields for your new menu, including Menu name and Description.
- Click on the Save button to create the new menu.
Step 4: Add Menu Links
- On the Menus page, find the menu to which you want to add links and click on the Add link link.
- Fill in the fields for your menu link, including Menu link title, Link (URL or internal path), and any Description.
- Choose the Parent link if you want to nest this link under another menu item.
- Set the Weight to control the order of the menu items. Lower weights appear before higher weights.
- Click on the Save button to add the menu link.
Step 5: Edit Menu Links
- On the Menus page, find the menu containing the link you want to edit and click on the Edit menu link.
- Find the link you want to edit and click on the Edit link next to it.
- Make the necessary changes to the menu link fields.
- Click on the Save button to update the menu link.
Step 6: Delete Menu Links
- On the Menus page, find the menu containing the link you want to delete and click on the Edit menu link.
- Find the link you want to delete and click on the Delete link next to it.
- Confirm the deletion by clicking on the Delete button in the confirmation dialog.
Step 7: Reorder Menu Links
- On the Menus page, find the menu you want to reorder and click on the Edit menu link.
- Drag and drop the menu links to reorder them as needed. You can also adjust the Weight field to change the order.
- Click on the Save configuration button to apply your changes.
Additional Tips
- Use Descriptive Titles: Use clear and descriptive titles for your menu links to help users understand where each link will take them.
- Organize Links Logically: Group related links together and use nested menus to create a logical structure for your navigation.
- Monitor and Update Menus: Regularly review your menus to ensure they are up-to-date and reflect the current structure of your site.
- Use Pathauto Module: Consider using the Pathauto module to automatically generate user-friendly URLs for your content, making it easier to manage and link to pages.
Conclusion
By following these steps, you can effectively manage menus in Drupal, ensuring that your site’s navigation is well-organized and user-friendly. Regularly reviewing and updating your menus will help maintain a smooth and intuitive navigation experience for your site visitors.

