9. How to manage blocks in Drupal
This tutorial assumes you’ve already logged in to Drupal
1) Click the Administer link
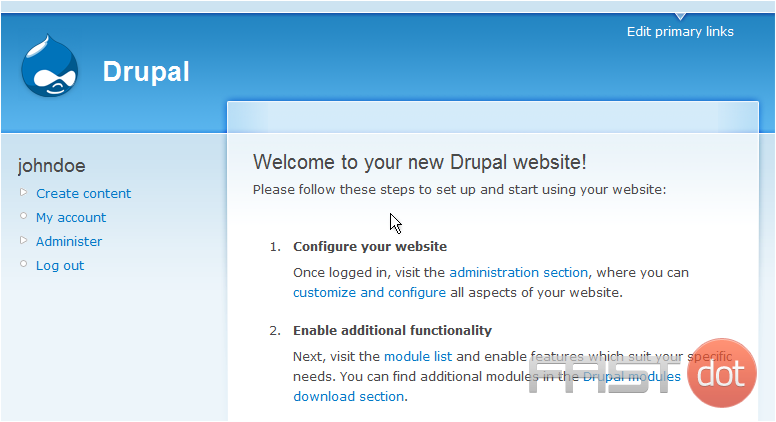
Now let’s learn how to manage blocks
2) Then click the Blocks link

This is the Blocks management page

Blocks are boxes of content that can be arranged and displayed in certain areas of your web page
3) Click the Add block link

4) Enter the Block description here

5) Click Save block

That’s it! The new block has been created
Now let’s edit the new block
Here we can see a list of all blocks in our website, including which ones are enabled… and which ones are currently disabled (including the New Block we just created)
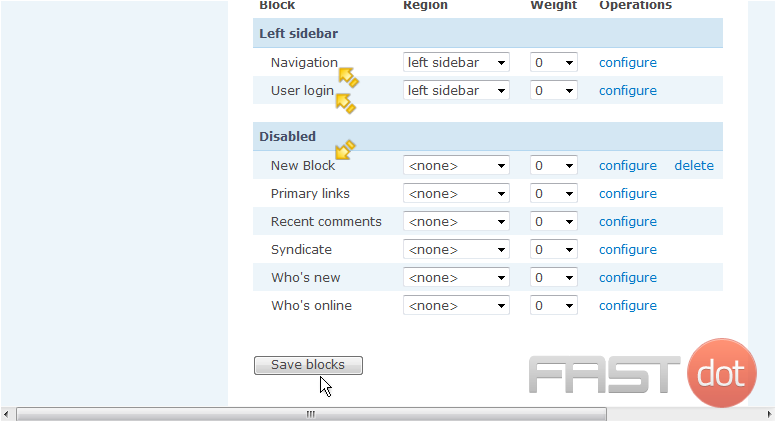
6) Click here to show the new block in the left sidebar

7) When finished, click Save blocks
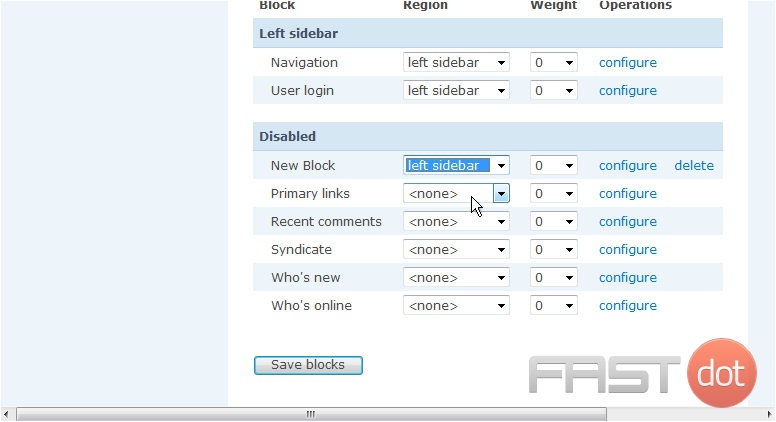
That’s all there is to it!
8) To delete the new block we just setup, click the delete link here
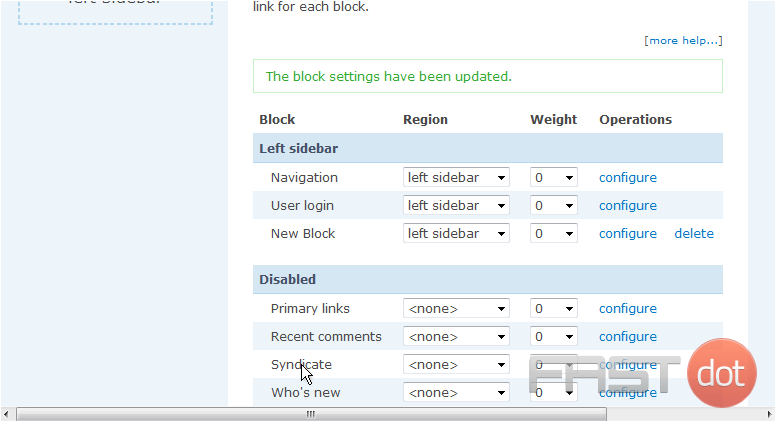
9) Click Delete to confirm
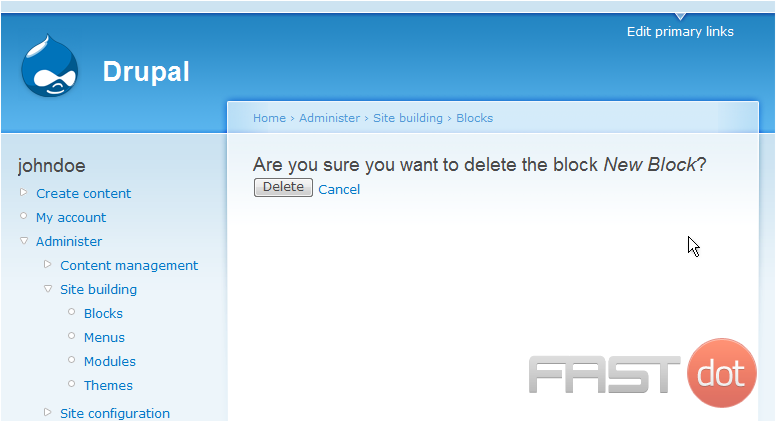
The block we created has now been deleted
This is the end of the tutorial. You now know how to manage blocks in Drupal
How to Manage Blocks in Drupal
Managing blocks in Drupal involves creating, configuring, and placing blocks within your site’s layout. Blocks are reusable pieces of content or functionality that can be displayed in various regions of your Drupal site. Follow the steps below to manage blocks in Drupal.
Steps to Manage Blocks in Drupal
Step 1: Log in to Your Drupal Admin Panel
- Access the Drupal site: Open your browser and go to the Drupal site where you want to manage blocks.
- Log in: Click on the Log in link usually located at the top right corner of the page. Enter your username and password, then click Log in.
Step 2: Navigate to the Block Layout Page
After logging in, navigate to the Block Layout page:
- Click on Manage in the top menu.
- In the submenu, click on Structure.
- Under Structure, click on Block layout.
Step 3: Place a Block
- On the Block Layout page, you will see a list of regions defined by your theme.
- To place a block, find the region where you want to add the block and click on the Place block button next to that region.
- A list of available blocks will appear. Find the block you want to add and click on the Place block button next to it.
- Configure the block settings, such as the block title, visibility settings, and custom configuration options.
- Click on the Save block button to place the block in the selected region.
- How to build a website with WordPress and what are the best plugins to use Building a website with WordPress is an excellent choice due to its versatility, ease of use, and a vast array of plugins that enhance functionality. Here’s a comprehensive guide to building a WordPress website, along with recommendations for the best plugins
- Top WordPress Plugins for Managing Ads and Monetizing Your Website Effectively: Why is Ads Management Important for Website Monetization? Strategic ad placement throughout the website enables publishers to maximize ad revenue while ensuring a positive user experience. The positioning of ads is critical in capturing users’ attention without being intrusive or disruptive. By understanding user behavior and preferences, publishers can make informed decisions regarding ad placement to ensure that the ads are relevant and engaging.
- Top Directory Plugins for WordPress to Create Professional Listings and Directories: If you are interested in establishing professional listings and directories on your WordPress website, the following information will be of value to you. This article will present the top directory plugins available for WordPress, which include GeoDirectory, Business Directory Plugin, Sabai Directory, Connections Business Directory, and Advanced Classifieds & Directory Pro.
- The Most Important Stages and Plugins for WordPress Website Development: Developing a WordPress website requires careful planning, execution, and optimisation to ensure it is functional, user-friendly, and effective. The process can be broken into key stages, and each stage benefits from specific plugins to enhance functionality and performance. Here’s a detailed guide to the most important stages of WordPress website development and the essential plugins for each stage.
- .org vs .com: A Top Guide to the Differences in Domain Extension
When you set up a website for a business or a non-profit organisation, you might think the most important part of the address is the actual name. But the domain extension (the bit that comes after the dot) is just as important for telling people what your site is all about. - The Best WordPress Plugins for Image Optimization to Improve Load Times and SEO. The pivotal element lies in image optimization. This discourse delves into the significance of image optimization for websites and its impact on load times. Furthermore, we will delve into the advantages of leveraging WordPress plugins for image optimization, such as streamlined optimization processes, enhanced SEO, expedited load times, and an enriched user experience.
- What is a data center or Internet data center? The term “data center” has become very common due to the role it plays in many of our daily activities. Most of the data we receive and send through our mobile phones, tablets and computers ends up stored in these data centers — which many people refer to as “the Cloud”, in a more generic way.
Step 4: Configure Block Settings
- On the Block Layout page, find the block you want to configure and click on the Configure link next to it.
- Adjust the block settings as needed, including the title, visibility settings, and custom configuration options.
- Click on the Save block button to apply your changes.
Step 5: Rearrange Blocks
- On the Block Layout page, you can drag and drop blocks within their regions to rearrange them.
- Click and hold the drag handle next to the block you want to move, then drag it to the desired position within the region.
- Click on the Save blocks button at the bottom of the page to save the new block arrangement.
Step 6: Remove a Block
- On the Block Layout page, find the block you want to remove and click on the Configure link next to it.
- Scroll down and click on the Remove block button.
- Confirm the removal by clicking on the Remove button in the confirmation dialog.
Additional Tips
- Custom Blocks: You can create custom blocks by clicking on Custom block library under the Structure menu and then clicking on Add custom block.
- Block Visibility: Use the visibility settings to control when and where blocks appear based on content type, user role, or specific pages.
- Block Themes: Ensure your blocks are styled appropriately by customizing your theme or using block-specific classes.
- Backup: Regularly backup your site to avoid losing your block configurations and other important data.
Conclusion
By following these steps, you can effectively manage blocks in Drupal, ensuring that your site’s layout is well-organized and functional. Regularly reviewing and updating your blocks will help maintain a dynamic and user-friendly site.
