12. How to create menus in Drupal
This tutorial assumes you’ve already logged in to Drupal
1) Click the Administer link
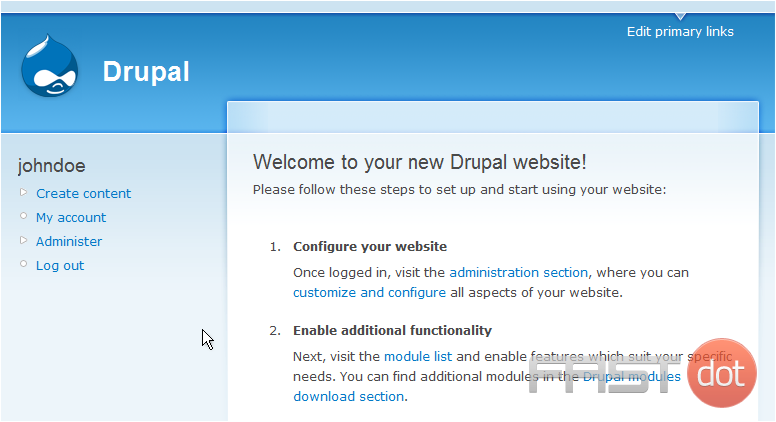
Now let’s learn how to create a new menu
2) Click the Menus link
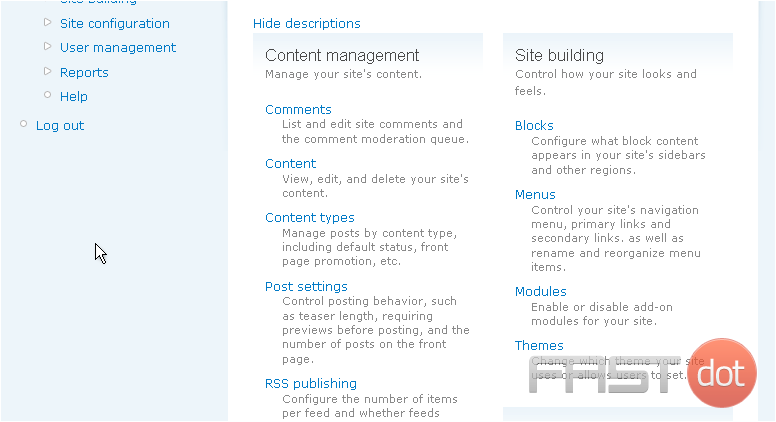
3) Then click Add Menu
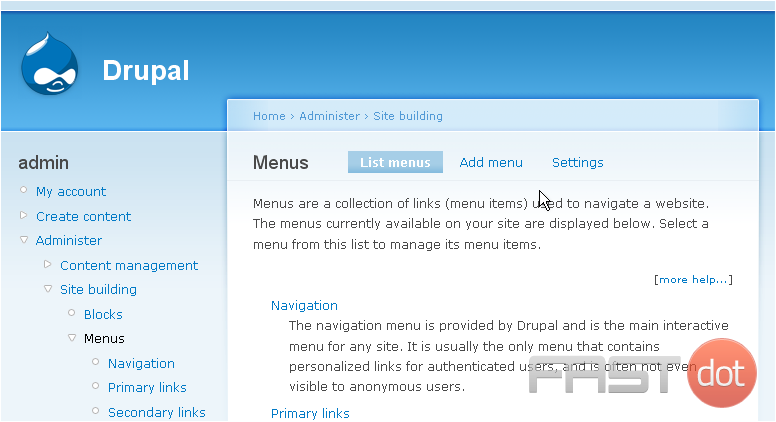
4) Enter a Menu Name here… it must contain all lowercase letters and have no spaces
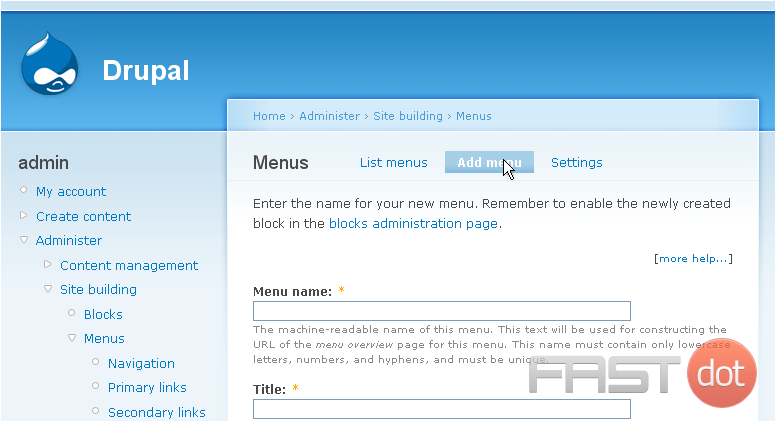
5) Then enter the title of the new menu here
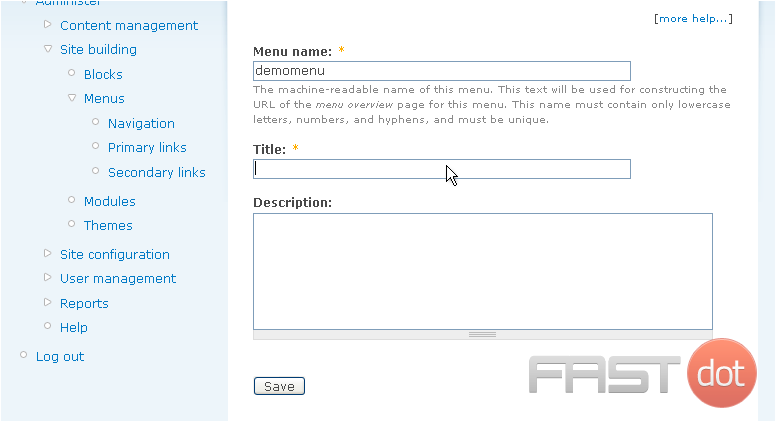
6) Click Save when ready
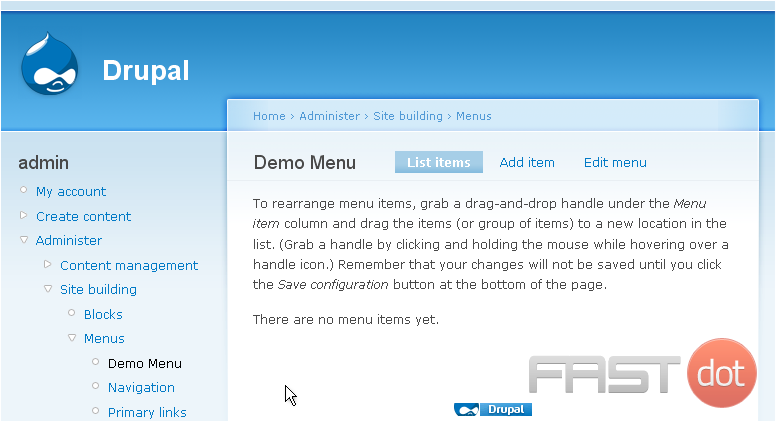
7) Now let’s add items to our menu
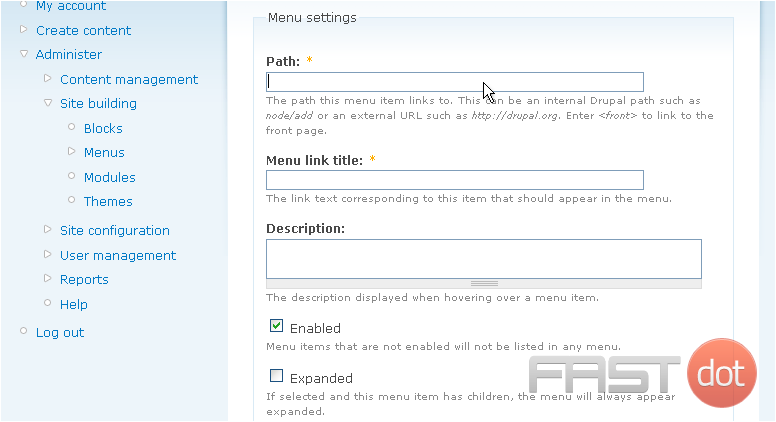
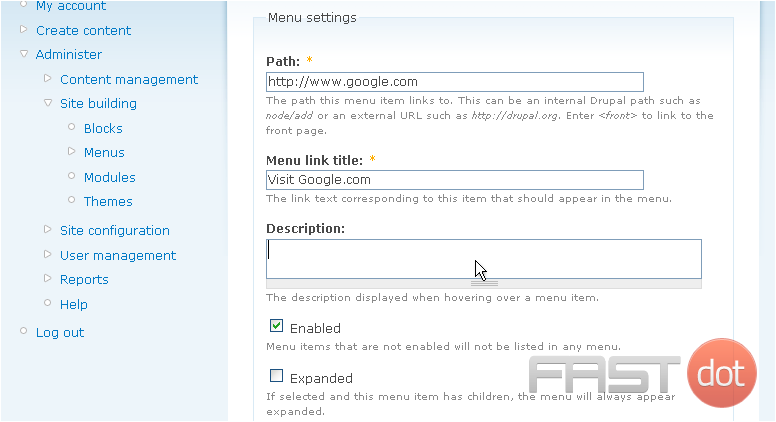
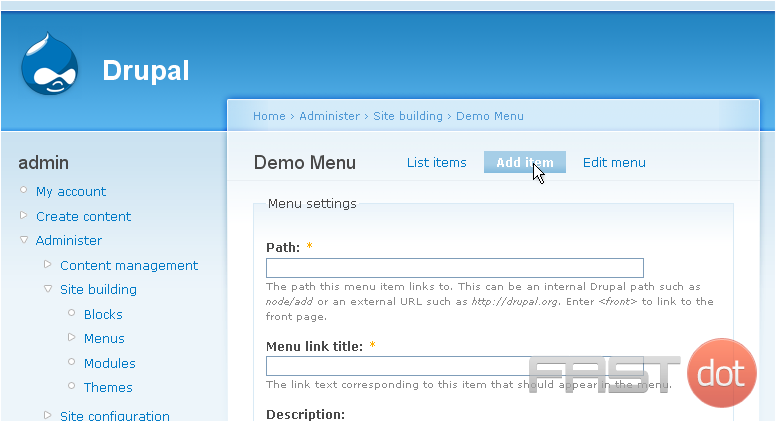
8) Enter the path this menu item links to
9) Then enter a menu link title
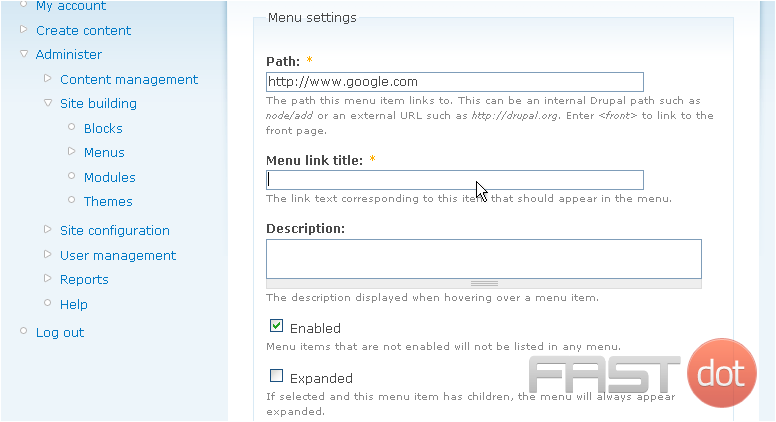
10) You can optionally enter a description
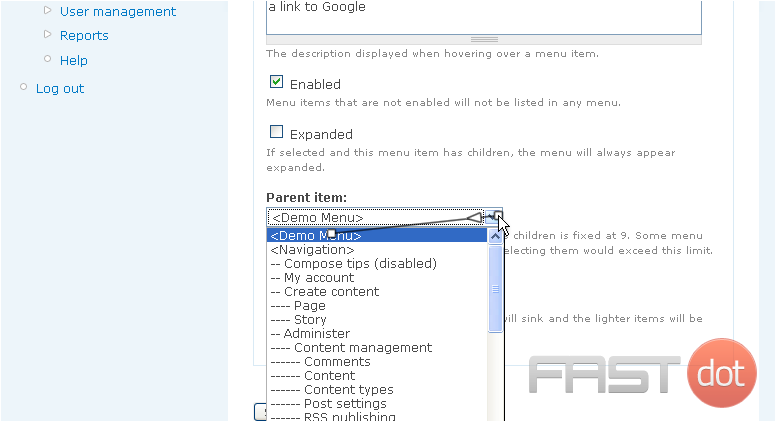
11) Make sure you have the proper menu selected as your parent item
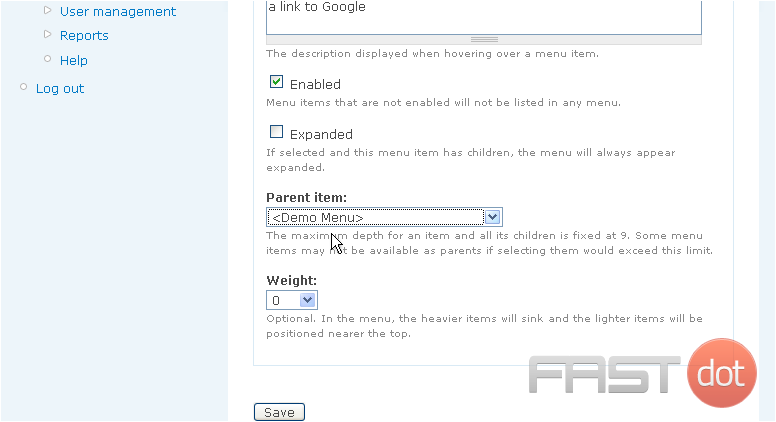
12) Click Save when ready
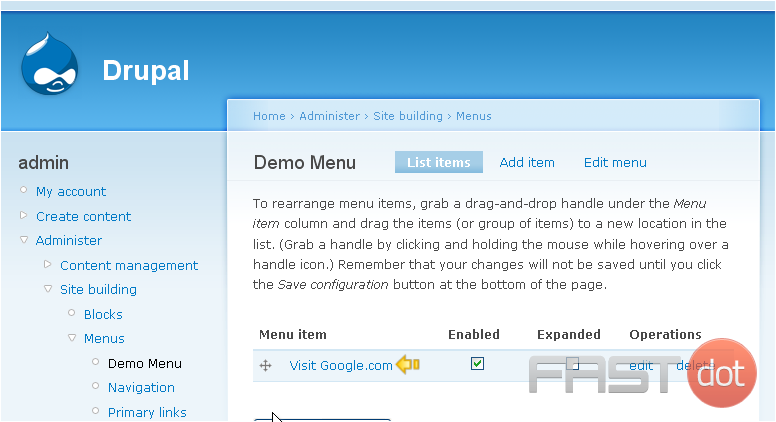
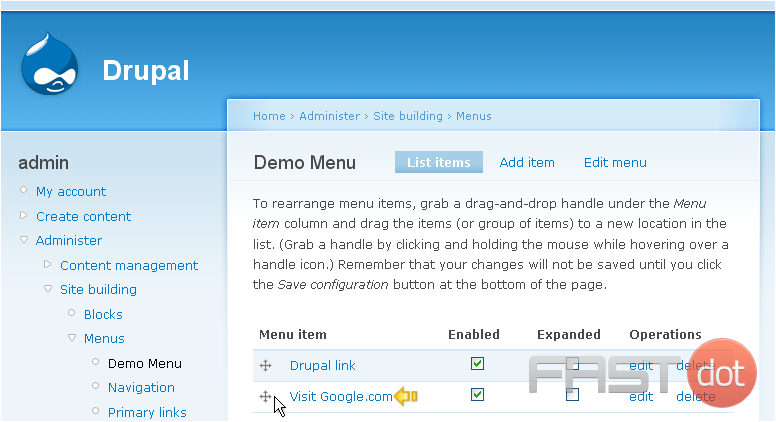
Our new menu item has been created, which you can see here
13) Let’s repeat the process and add a second menu item
There it is!
In order for the new menu to show up in your website, you must create a new block for it, and configure where it should go
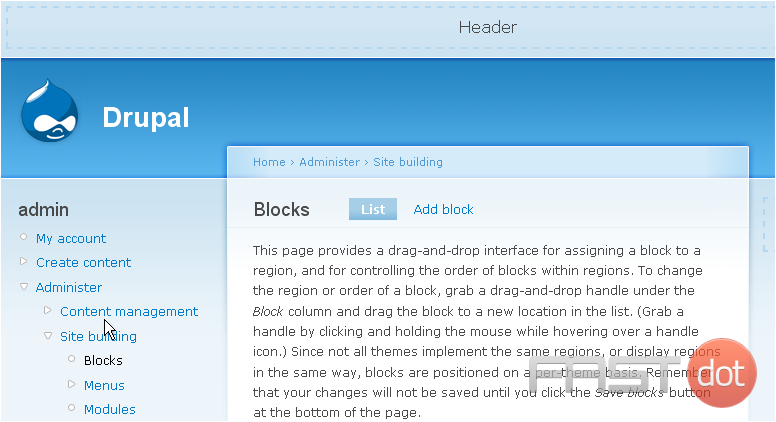
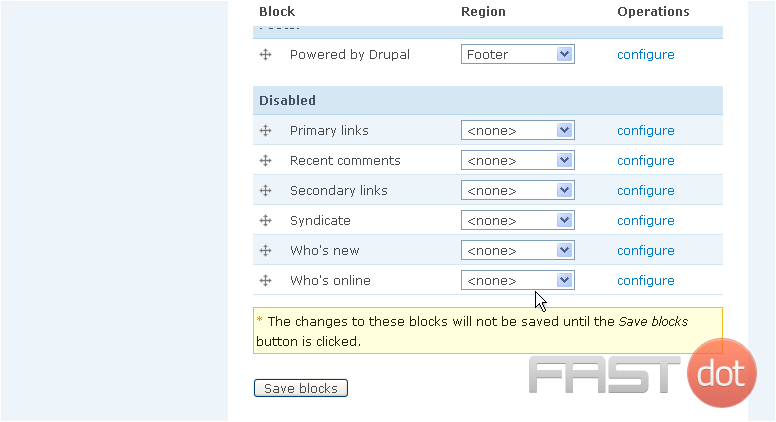
14) Locate the Demo Menu, and enable it by configuring its location
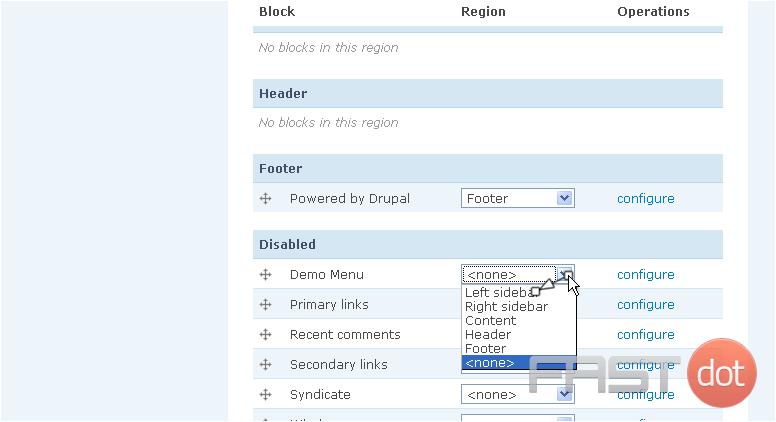
15) Be sure to click Save blocks to save our configuration
There it is! The new menu we just created, along with the two menu items

This is the end of the tutorial. You now know how to create menus in Drupal. Remember that you have to enable the menu block after creating it
How to Create Menus in Drupal
Creating menus in Drupal involves setting up navigation links that help users find their way around your site. Follow the steps below to create and manage menus in Drupal.
Steps to Create Menus in Drupal
Step 1: Log in to Your Drupal Admin Panel
- Access the Drupal site: Open your browser and go to the Drupal site where you want to manage menus.
- Log in: Click on the Log in link usually located at the top right corner of the page. Enter your username and password, then click Log in.
Step 2: Navigate to the Menus Page
After logging in, navigate to the Menus page:
- Click on Manage in the top menu.
- In the submenu, click on Structure.
- Under Structure, click on Menus.
Step 3: Create a New Menu
- On the Menus page, click on the Add menu button.
- Fill in the fields for your new menu, including Menu name and Description.
- Click on the Save button to create the new menu.
Step 4: Add Menu Links
- On the Menus page, find the menu to which you want to add links and click on the Add link link.
- Fill in the fields for your menu link, including Menu link title, Link (URL or internal path), and any Description.
- Choose the Parent link if you want to nest this link under another menu item.
- Set the Weight to control the order of the menu items. Lower weights appear before higher weights.
- Click on the Save button to add the menu link.
Step 5: Edit Menu Links
- On the Menus page, find the menu containing the link you want to edit and click on the Edit menu link.
- Find the link you want to edit and click on the Edit link next to it.
- Make the necessary changes to the menu link fields.
- Click on the Save button to update the menu link.
Step 6: Delete Menu Links
- On the Menus page, find the menu containing the link you want to delete and click on the Edit menu link.
- Find the link you want to delete and click on the Delete link next to it.
- Confirm the deletion by clicking on the Delete button in the confirmation dialog.
Step 7: Reorder Menu Links
- On the Menus page, find the menu you want to reorder and click on the Edit menu link.
- Drag and drop the menu links to reorder them as needed. You can also adjust the Weight field to change the order.
- Click on the Save configuration button to apply your changes.
Additional Tips
- Use Descriptive Titles: Use clear and descriptive titles for your menu links to help users understand where each link will take them.
- Organize Links Logically: Group related links together and use nested menus to create a logical structure for your navigation.
- Monitor and Update Menus: Regularly review your menus to ensure they are up-to-date and reflect the current structure of your site.
- Use Pathauto Module: Consider using the Pathauto module to automatically generate user-friendly URLs for your content, making it easier to manage and link to pages.
Conclusion
By following these steps, you can effectively create and manage menus in Drupal, ensuring that your site’s navigation is well-organized and user-friendly. Regularly reviewing and updating your menus will help maintain a smooth and intuitive navigation experience for your site visitors.

