This tutorial assumes you’ve already logged in to Drupal
1) Click the Administer link
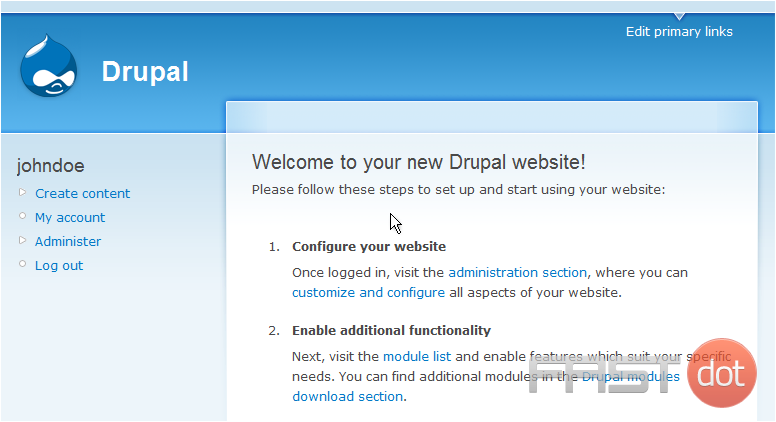
Now let’s learn how to configure our site
2) Then click Site configuration

3) Click the Administration theme link
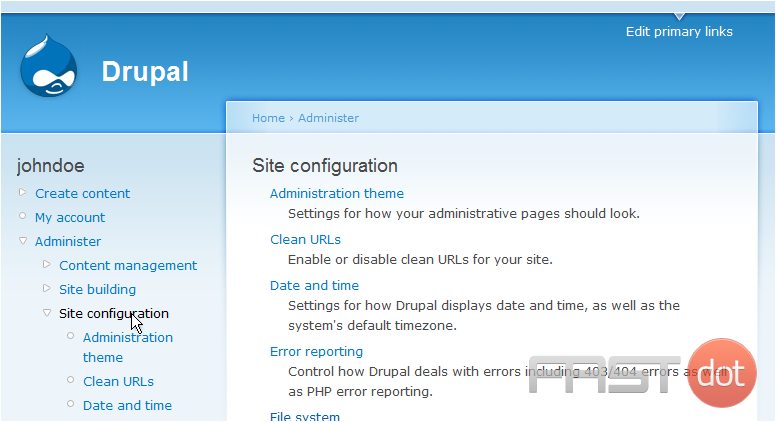
This is the Site Configuration page where we can modify many aspects of our Drupal site
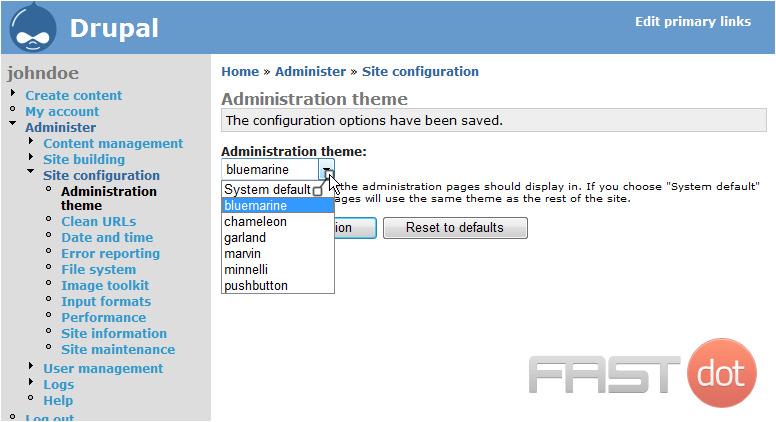
4) Click here to show the theme dropdown menu and seletct a new theme
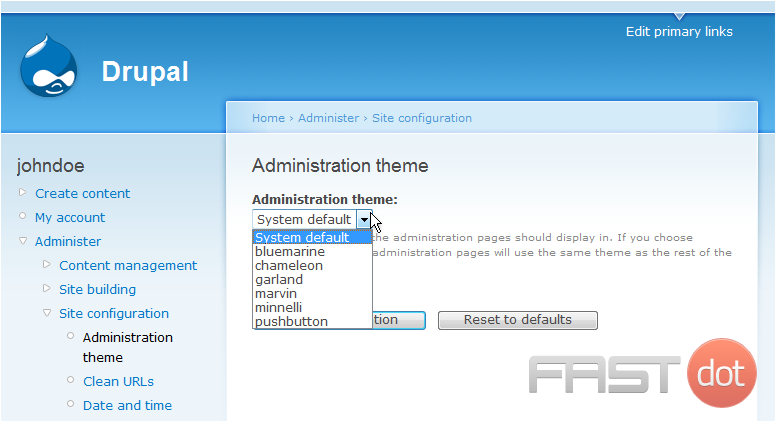
This is the theme page where we can change the look of our Drupal Administration area
5) Click Save configuration
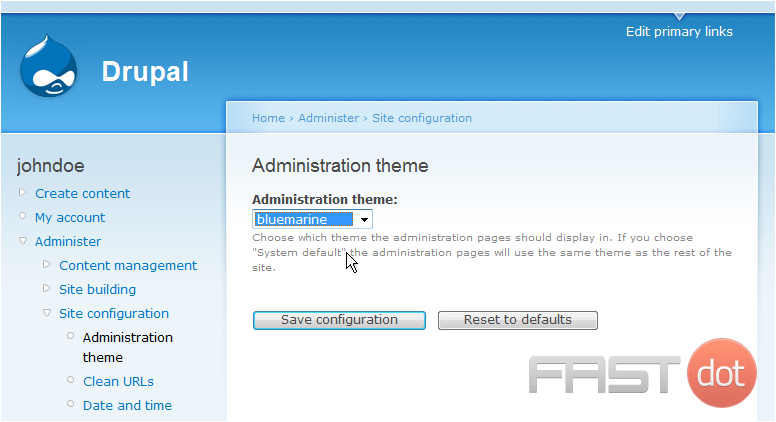
As you can see, our theme has changed to the bluemarine theme

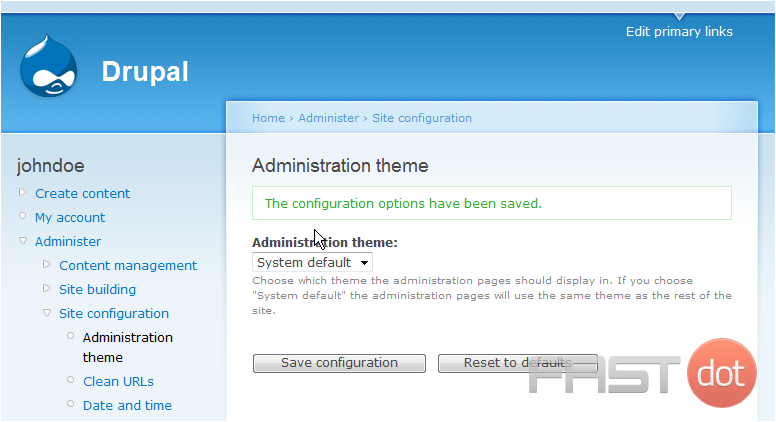
6) Let’s change back to the default theme
That’s it! Our theme has been changed back to the default
- How to build a website with WordPress and what are the best plugins to use: Building a website with WordPress is an excellent choice due to its versatility, ease of use, and a vast array of plugins that enhance functionality. Here’s a comprehensive guide to building a WordPress website, along with recommendations for the best plugins.
- What does this property buzzword mean and how does it actually work? Gearing simply means borrowing money to buy an asset. Negative gearing can be a tax strategy used by investors and describes when the income (ie, the rent) made from an investment is less than the expenses it incurs, meaning it’s making a loss.
- How to Sell Your Ecommerce Business for the Best Value: Selling an ecommerce business can be a very profitable move. You can use the proceeds to invest in other projects, launch new ecommerce business websites, or even retire. For some startups, selling the business is the end goal. Whether you have a dropshipping website, sell with Amazon FBA, or own a large-scale ecommerce business, there’s an opportunity for you to sell.
- Comprehensive Guide to WordPress Website Development: Developing a WordPress website is a sequential process that requires careful planning, thoughtful execution, and consistent maintenance to ensure it meets the needs of users and achieves its intended goals. This involves a series of clearly defined stages, including planning, designing, content creation, optimisation, and ongoing maintenance.
- Top 10 High-Paying Jobs AI Won’t Replace in 2025: Artificial Intelligence (AI) is revolutionizing industries, automating repetitive tasks, and reshaping the global workforce. Despite its remarkable advancements, certain professions remain beyond AI’s capabilities due to their reliance on uniquely human traits like creativity, empathy, and critical thinking. This case study explores the 10 highest-paying, fastest-growing jobs in 2025 that AI won’t replace, delving into why these roles are indispensable and how they are evolving in an AI-driven world.
- Spill Your Guts: What To Wear To Olivia Rodrigo’s Australian Tour: Never afraid of screaming out all the dark, embarrassing things we’ve all thought before, Rodrigo sings about comparing herself to her boyfriend’s ex-girlfriend. If you want an edgy outfit that mimics the music…
- Top Social Media Plugins for WordPress to Increase Your Sites Reach and Engagement: If you are seeking to enhance your website’s reach and engagement on social media, you have come to the right place. In this article, we will delve into the premier social media plugins tailored for WordPress users. From Social Warfare to Jetpack, these plugins can facilitate seamless sharing of your content across diverse social platforms.Furthermore, we will provide recommendations to optimize your website’s visibility on social media. Keep an eye out for valuable insights!
- How to Change PuTTY’s Appearance: PuTTY is a widely-used SSH and telnet client for Windows and Linux hosting. While its default appearance is functional, you can customise it to improve aesthetics and usability. Below are the steps to modify PuTTY’s appearance, including changing the font, window size, colours, and cursor options.
- What programming languages does vBulletin use?: vBulletin was orginally written in perl and used a flat file database system. However, as sites grew they notice that sites could not cope with a large amounts of traffic. This problem has now been fully rectified when vBulletin was converted to php and a mysql database system.
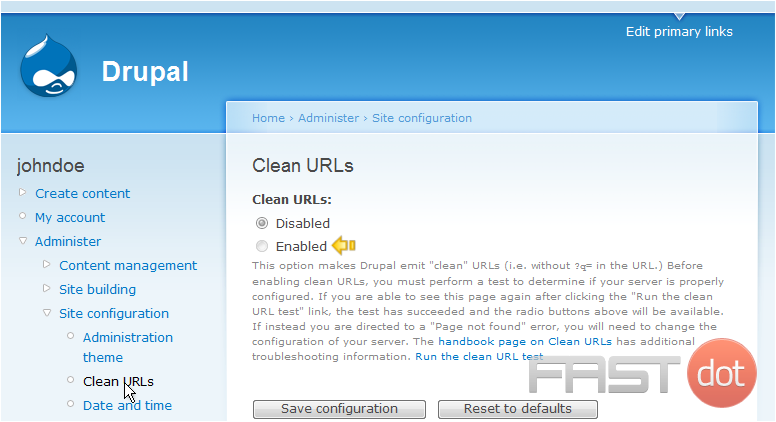
7) Next, click the Clean URLs link
If this option is enabled, the URL’s created by Drupal will be “clean” which will make them more efficient for search engine indexing. To enable Clean URLs, click here
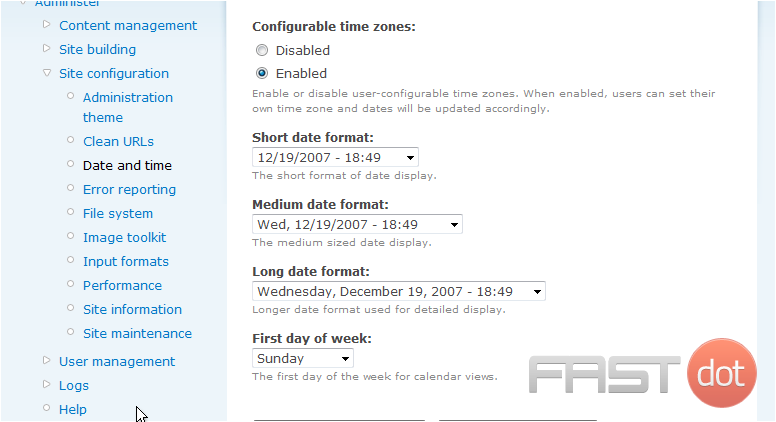
8) Click the Date and time link
This is the Date and Time area, where we can configure how the dates and times are displayed
9) Click the Error reporting link
On this page we can customize the error report pages
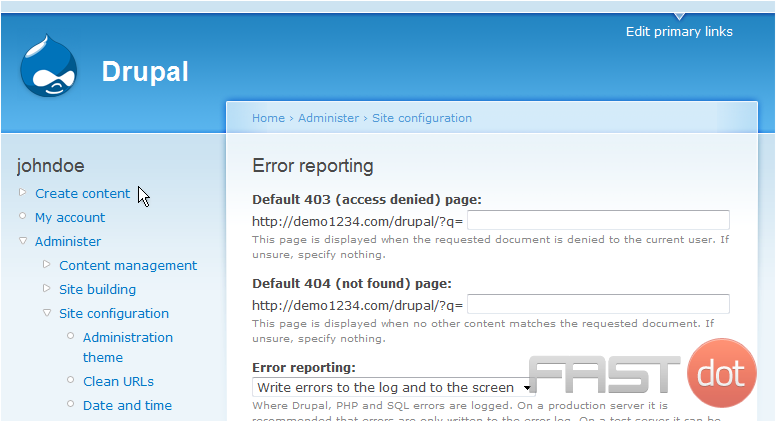
10) Click the Site information link
This is the Site Information page where we can set a name and slogan for our Drupal site
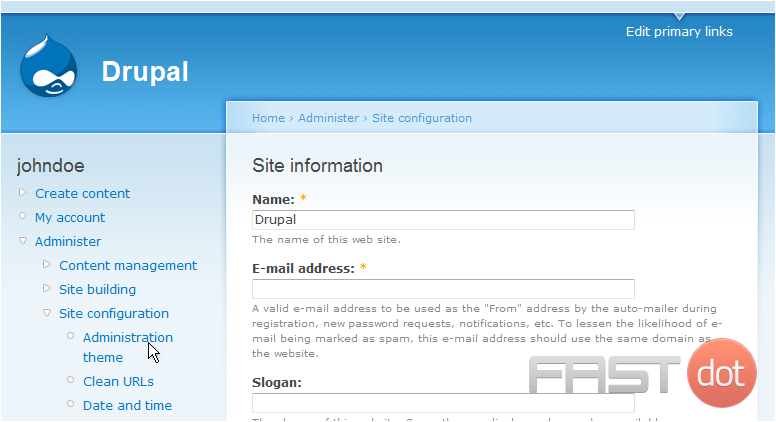
11) Enter a Name for the site here
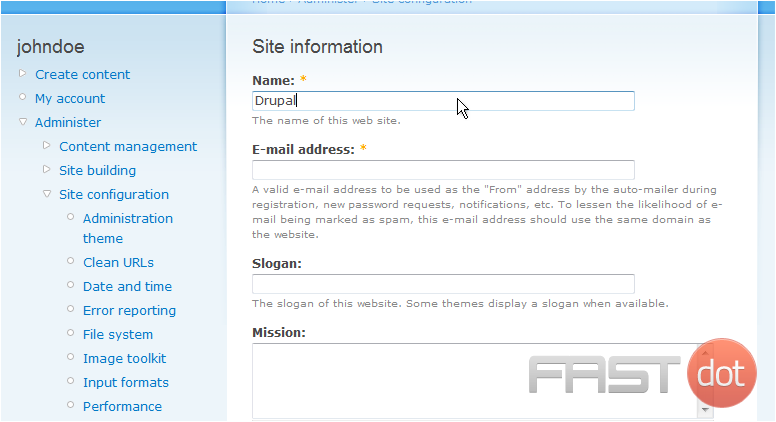
12) Then enter your Email address
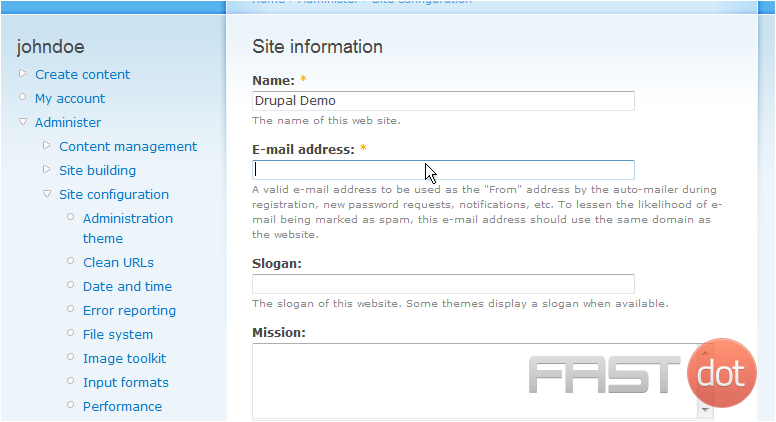
13) You can optionally enter a Slogan here
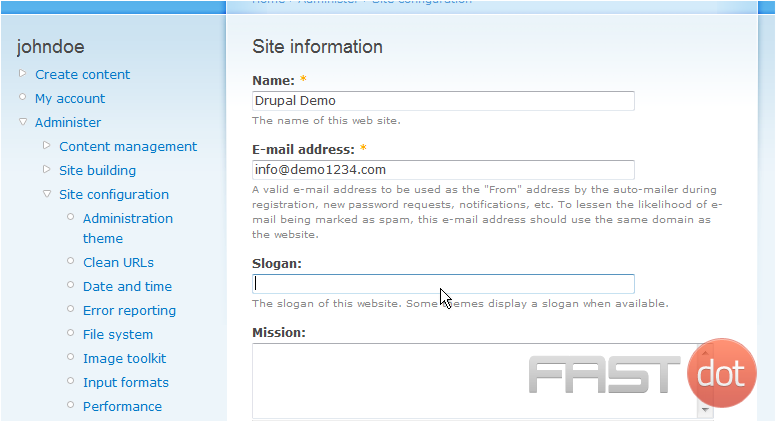
14) When finished, click Save configuration
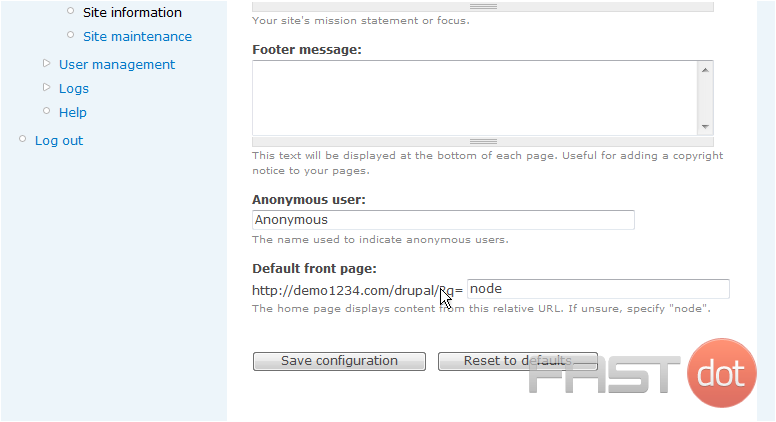
That’s it! Our information has been changed and you can see our new site name here
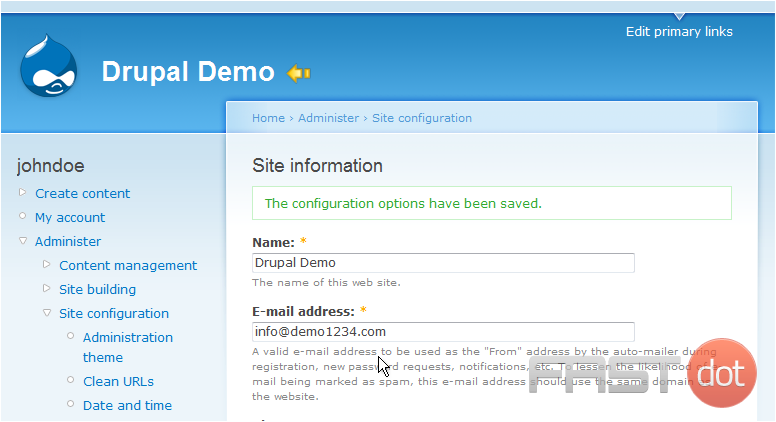
This is the end of the tutorial. You now know how to configure your site in Drupal
How to Configure Your Site in Drupal
Configuring your Drupal site involves setting up various aspects such as site information, regional settings, content authoring, and performance settings. Follow the steps below to configure your Drupal site effectively.
Steps to Configure Your Site in Drupal
Step 1: Log in to Your Drupal Admin Panel
- Access the Drupal site: Open your browser and go to the Drupal site where you want to manage configurations.
- Log in: Click on the Log in link usually located at the top right corner of the page. Enter your username and password, then click Log in.
Step 2: Navigate to the Configuration Page
After logging in, navigate to the Configuration page:
- Click on Manage in the top menu.
- In the submenu, click on Configuration.
Step 3: Configure Site Information
To configure basic site information:
- Under System, click on Basic site settings.
- Fill in the required fields such as Site name, Slogan, Email address, and Default front page.
- Click on Save configuration to apply your changes.
Step 4: Configure Regional Settings
To configure regional settings such as time zone and locale:
- Under Regional and language, click on Regional settings.
- Select your Default country and Time zone.
- Click on Save configuration to apply your changes.
Step 5: Configure Content Authoring Settings
To configure content authoring settings:
- Under Content authoring, click on Text formats and editors.
- Configure the text formats and editors according to your requirements. You can enable or disable text formats and adjust their settings.
- Click on Save configuration to apply your changes.
Step 6: Configure Performance Settings
To configure performance settings for your site:
- Under Development, click on Performance.
- Enable Caching options such as Cache pages for anonymous users and Cache blocks.
- Configure Bandwidth optimization settings like Aggregate CSS files and Aggregate JavaScript files.
- Click on Save configuration to apply your changes.
Step 7: Configure User Accounts
To configure user account settings:
- Under People, click on Account settings.
- Configure the settings such as Who can register accounts, Administrator approval, and Email verification.
- Click on Save configuration to apply your changes.
Step 8: Configure URL Aliases
To configure URL aliases for clean URLs:
- Under Search and metadata, click on URL aliases.
- Create path patterns for different content types and configure automatic URL alias settings.
- Click on Save configuration to apply your changes.
Additional Tips
- Regularly Update Drupal: Keep your Drupal installation and modules up to date to ensure security and access to new features.
- Backup Your Site: Regularly backup your site to prevent data loss in case of a security breach or system failure.
- Use SEO Best Practices: Configure meta tags, URL aliases, and other SEO settings to improve your site’s visibility in search engines.
- Monitor Site Performance: Regularly monitor site performance and make necessary adjustments to optimize speed and user experience.
Conclusion
By following these steps, you can effectively configure your Drupal site to meet your needs and ensure a smooth user experience. Regularly reviewing and updating your site settings will help maintain the functionality and security of your Drupal site.


